
Deploy Your App in 5 minutes with Fly.io (Sponsored)
Tired of juggling cloud regions, YAML files, and complex ops just to get your app live? Fly.io makes it easy.
Deploy straight from your Dockerfile — your app runs close to users worldwide with Anycast IPs, WireGuard-secured networking, and smart autoscaling built in.
Unlike traditional serverless platforms, Fly.io supports stateful apps. Full-stack deployments, managed Postgres, and persistent volumes are all built-in. Host your frontend, API, and database together — globally.
With predictable pricing and micro instances for side projects and startups, Fly.io makes global app hosting accessible to everyone.
You basically need 2 commands to deploy and run your app:
shell$ fly launch Creating app in \fly\guides\hellodotnet ? Choose an app name (leave blank to generate one): hellodotnet ? Select Organization: demo (demo) ? Select region: ord (Chicago, Illinois (US)) Admin URL: https://fly.io/apps/hellodotnet Hostname: hellodotnet.fly.dev ? Would you like to set up a Postgresql database now? No ? Would you like to set up an Upstash Redis database now? No Wrote config file fly.toml ? Would you like to deploy now? Yes Deploying hellodotnet ... $ flyctl apps open Opening https://hellodotnet.fly.dev/
If you're a .NET developer, check out the Fly.io .NET guide and see how easy it is to deploy and run global.
Intro
Scheduling background jobs is a fundamental part of many .NET applications — whether it's sending emails, processing reports, or syncing data.
For years, developers have relied on tools like Quartz.NET and Hangfire.
While they are great tools, they have several drawbacks.
Quartz.NET drawbacks:
- Reflection-based job registration
- Complex API
- Heavy configuration
- Clumsy parameter passing into the jobs
- No built-in EF Core integration (only via 3rd party packages)
- No built-in dashboard for job monitoring (only via 3rd party packages)
- No built-in retries
Hangfire drawbacks:
- Reflection-based job registration
- Limited DI-support
- Limited async support
- Some built-in storage providers require a commercial license
TickerQ is a fresh take on job scheduling in .NET — offering a modern, clean API, built-in persistence, EF Core integration, and a beautiful dashboard for job monitoring.
It removes much of the boilerplate and ceremony we're used to, and instead provides a developer-friendly, code-first experience.
In this post, we will explore:
- How to set up TickerQ in a .NET project
- Integrating TickerQ with EF Core
- Creating and scheduling jobs (recurring and one-time)
- Dynamically registering jobs
- Using the TickerQ Dashboard to monitor job execution
Let's dive in!
Getting Started with TickerQ
TickerQ is available as a NuGet package that targets .NET Standard 2.1 and is compatible with any .NET Core 3.1+ application. It works out of the box with ASP.NET Core and doesn't require any additional configuration files — everything is code-first and dependency-injection friendly.
Follow these steps to get started with TickerQ:
Step 1: Install the NuGet Package
bashdotnet add package TickerQ
This adds the core TickerQ library.
You can optionally install other packages like TickerQ.EntityFrameworkCore and TickerQ.Dashboard (we'll cover that in the next sections).
Step 2: Register TickerQ in the Program.cs
TickerQ plugs directly into your application startup pipeline.
Add the following lines in your Program.cs:
csharpbuilder.Services.AddTickerQ(); var app = builder.Build(); app.UseTickerQ(); app.Run();
AddTickerQ method registers all the required services for TickerQ.
UseTickerQ method adds the middleware that handles the incoming requests.
That's it. No background services to manage. No additional hosted services. TickerQ takes care of that for you under the hood.
Step 3: Define a Job
TickerQ jobs are just regular class methods, and classes don't need to inherit any interfaces or base classes.
Simply add the TickerFunction attribute to any method in any class.
Here is an example of a job that creates reports:
csharppublic class CreateReportJob { private readonly ReportDbContext _dbContext; public CreateReportJob(ReportDbContext dbContext) { _dbContext = dbContext; } [TickerFunction(functionName: "Send Notifications", cronExpression: "0 * * * *")] public async Task CreateReport(TickerFunctionContext tickerContext, CancellationToken cancellationToken) { var report = new Report { Title = $"Scheduled Report - {DateTime.UtcNow:yyyy-MM-dd HH:mm}", Content = $"This is an automatically generated report created at {DateTime.UtcNow:yyyy-MM-dd HH:mm:ss}", CreatedAt = DateTime.UtcNow }; _dbContext.Reports.Add(report); await _dbContext.SaveChangesAsync(cancellationToken); } }
In this example, TickerQ will call the CreateReport method every hour.
The cronExpression parameter is optional and can be used to schedule recurring jobs based on a cron expression.
If you omit it, you can either configure the schedule when registering TickerQ in the DI or specify it dynamically.
Dependency injection is supported out of the box, and you can specify as many job methods in a single class as you want.
Here, the TickerFunctionContext is used to access additional information about the job execution.
You can also use the context to cancel or delete the job:
csharptickerContext.CancelTicker(); await tickerContext.DeleteAsync();
You can also reference cron expressions from appsettings.json using %Section:Key% syntax:
csharp[TickerFunction(FunctionName: "ExampleMethod", CronExpression: "%CronTicker:EveryMinute%")] public void ExampleMethod() { }
json{ "CronTicker": { "EveryMinute": "* * * * *" } }
Step 4: Handling Exceptions (optional)
To handle exceptions, you can implement the ITickerExceptionHandler interface and register it in the DI:
csharppublic class TickerExceptionHandler : ITickerExceptionHandler { public async Task HandleExceptionAsync(Exception exception, Guid tickerId, TickerType tickerType) { // your logic... } public async Task HandleCanceledExceptionAsync(Exception exception, Guid tickerId, TickerType tickerType) { // your logic... } }
csharpservices.AddTicker(opt => { opt.SetExceptionHandler<TickerExceptionHandler>(); });
Now let's explore how to integrate TickerQ with EF Core.
Integrating TickerQ with EF Core
To make TickerQ production‑ready, especially in cases where your app may be restarted or scaled across instances, you'll want persistence.
EF Core provides TickerQ with a relational store for job state, history, locking, and recovery.
First, install the EF Core extension for TickerQ:
bashdotnet add package TickerQ.EntityFrameworkCore
In your service registration, enable EF Core features when calling AddTickerQ(...).
For example:
csharpservices.AddTickerQ(options => { // Set a fallback timeout to check for missed jobs and execute. options.UpdateMissedJobCheckDelay(TimeSpan.FromSeconds(10)); options.SetInstanceIdentifier("TickerQ"); // Configure the EF Core–backed operational store for TickerQ metadata, locks, and state. options.AddOperationalStore<ReportDbContext>(efCoreOptions => { // Apply custom model configuration only during EF Core migrations // (design-time). The runtime model remains unaffected. // efCoreOptions.UseModelCustomizerForMigrations(); // On app start, cancel tickers left in Expired or InProgress (terminated) states // to prevent duplicate re-execution after crashes or abrupt shutdowns. efCoreOptions.CancelMissedTickersOnAppStart(); // Defined cron-based functions are auto-seeded in the database by default. // Example: [TickerFunction(..., "*/5 * * * *")] // Use this to ignore them and keep seeds runtime-only. efCoreOptions.IgnoreSeedMemoryCronTickers(); }); });
TickerQ uses EF Core to define its own internal tables/entities.
You have two options:
1. Use built‑in model customization for migrations
If you call UseModelCustomizerForMigrations(), the TickerQ entity configurations are applied automatically during migrations. This keeps things clean.
2. Manual configuration in the DbContext
If you don't use the model customizer, you need to apply the entity configurations in OnModelCreating explicitly, e.g.:
csharppublic class ReportDbContext : DbContext { public ReportDbContext(DbContextOptions<ReportDbContext> options) : base(options) { } public DbSet<Report> Reports { get; set; } = null!; protected override void OnModelCreating(ModelBuilder modelBuilder) { base.OnModelCreating(modelBuilder); modelBuilder.HasDefaultSchema(DbConsts.SchemaName); // Adds TickerQ schema to EntityFrameworkCore modelBuilder.ApplyConfiguration(new TimeTickerConfigurations(schema: DbConsts.SchemaName)); modelBuilder.ApplyConfiguration(new CronTickerConfigurations(schema: DbConsts.SchemaName)); modelBuilder.ApplyConfiguration(new CronTickerOccurrenceConfigurations(schema: DbConsts.SchemaName)); // ... } }
After setup, create your EF migration as usual with the EF Core CLI command:
bashdotnet ef migrations add InitialMigration -c ReportDbContext
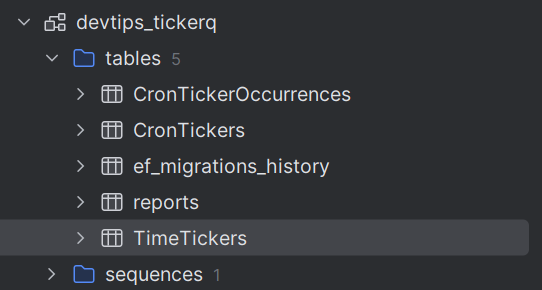
Here is what the database schema looks like with TickerQ tables:
Here is how you can seed initial tickers (time-based and cron-based):
csharpefCoreOptions.UseTickerSeeder( async timeTicker => { await timeTicker.AddAsync(new TimeTicker { Id = Guid.NewGuid(), Function = "Create Report", ExecutionTime = DateTime.UtcNow.AddSeconds(5) }); }, async cronTicker => { await cronTicker.AddAsync(new CronTicker { Id = Guid.NewGuid(), Expression = "0 0 * * *", // every day at 00:00 UTC Function = "Create Report" }); } );
You can use the TimeTicker to schedule a job to be executed at a specific time.
Dynamically Registering Jobs
TickerQ supports both one‑time / delayed jobs (called TimeTickers) and recurring or cron‑based jobs (called CronTickers).
You can schedule jobs dynamically via API endpoints or within the app startup, with retry policies, custom intervals, and more.
Suppose you have an API endpoint where a user requests sending a notification at a future date/time.
You can use the ITimeTickerManager<TimeTicker> to schedule such a job:
csharppublic record NotificationJobContext(string Title, string Content); app.MapPost("/api/schedule‑notification", async (NotificationRequest request, ITimeTickerManager<TimeTicker> timeTickerManager) => { if (request.ScheduledTime <= DateTime.Now) { return Results.BadRequest("Scheduled time must be in the future"); } // Create the typed job data. var jobData = new NotificationJobContext(request.Title, request.Content); // Schedule the job. var result = await timeTickerManager.AddAsync(new TimeTicker { Function = "Send Notifications", ExecutionTime = request.ScheduledTime.ToUniversalTime(), Request = TickerHelper.CreateTickerRequest(jobData), Retries = 3, RetryIntervals = new[] { 30, 60, 120 } // Retry after 30s, 60s, then 2 min }); return Results.Ok(new { JobId = result.Result.Id, Message = $"Notification '{request.Title}' scheduled for {request.ScheduledTime}" }); });
Here I pass the NotificationJobContext to the job and I can extract it in the job method:
csharppublic class NotificationJob { private readonly ILogger<NotificationJob> _logger; public const string TitleKey = "Title"; public const string ContentKey = "Content"; public NotificationJob(ILogger<NotificationJob> logger) { _logger = logger; } [TickerFunction(functionName: "Send Notifications", cronExpression: "0 0 * * *" )] public Task Execute(TickerFunctionContext<NotificationJobContext> tickerContext, CancellationToken cancellationToken) { var title = tickerContext.Request.Title; var content = tickerContext.Request.Content; // ... return Task.CompletedTask; } }
Alternatively, you can use the ICronTickerManager<CronTicker> to schedule a recurring job:
csharpvar result = await cronTickerManager.AddAsync(new CronTicker { Function = "Send Notifications", Request = TickerHelper.CreateTickerRequest(jobData), Expression = "* * * * *", Retries = 3, RetryIntervals = new[] { 30, 60, 120 } // Retry after 30s, 60s, then 2 min });
Here is how you can update and delete a CronTicker:
csharp// Update a CronTicker by ID // You get the ID when scheduling the job (result.Result.Id) await cronTickerManager.UpdateAsync(tickerId, ticker => { ticker.Description = "Updated cron description"; ticker.Expression = "*/10 * * * *"; // every 10 minutes }); // Delete a CronTicker by ID await cronTickerManager.DeleteAsync(tickerId);
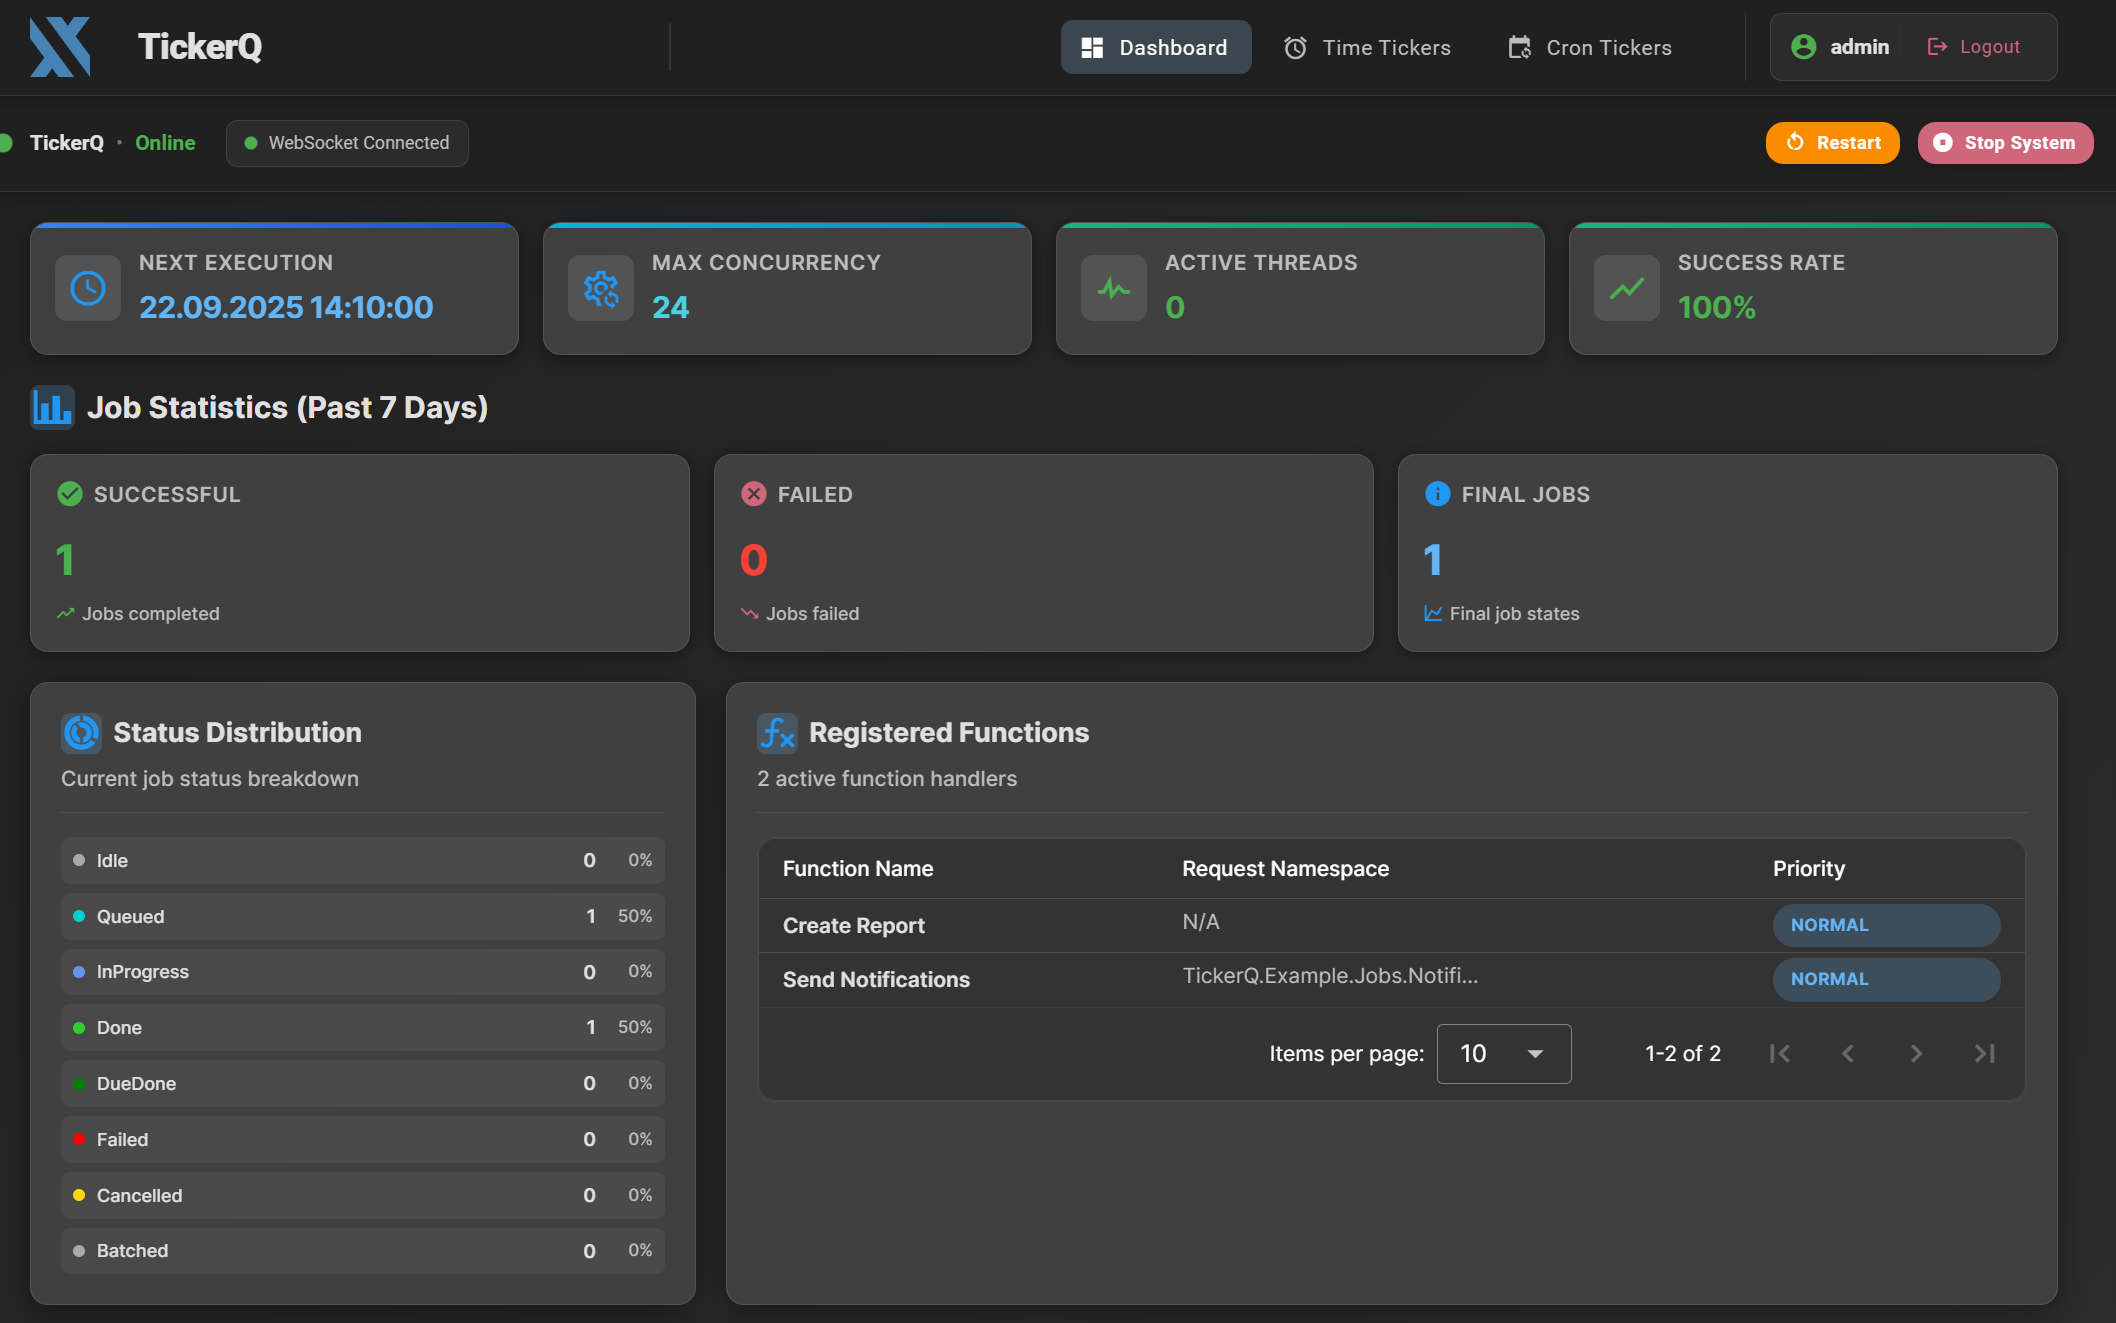
Using the TickerQ Dashboard
TickerQ has a built‑in, first‑party dashboard UI that gives you real‑time visibility and control over all your scheduled jobs (both time‑based and cron‑based).
It's useful for debugging, maintaining, and managing production workloads.
Add the TickerQ.Dashboard NuGet package to your project.
bashdotnet add package TickerQ.Dashboard
Register dashboard support when configuring TickerQ in DI:
csharpbuilder.Services.AddTickerQ(options => { // ... options.AddOperationalStore<ReportDbContext>(efCoreOptions => { // ... }); options.AddDashboard(x => { x.BasePath = "/tickerq-dashboard"; x.EnableBasicAuth = true; }); });
You can also configure authentication for the dashboard UI; see the documentation for more details.
TickerQ supports Basic Authentication out of the box for the dashboard UI.
You can configure credentials in your appsettings.json:
csharp"TickerQBasicAuth": { "Username": "admin", "Password": "admin" }
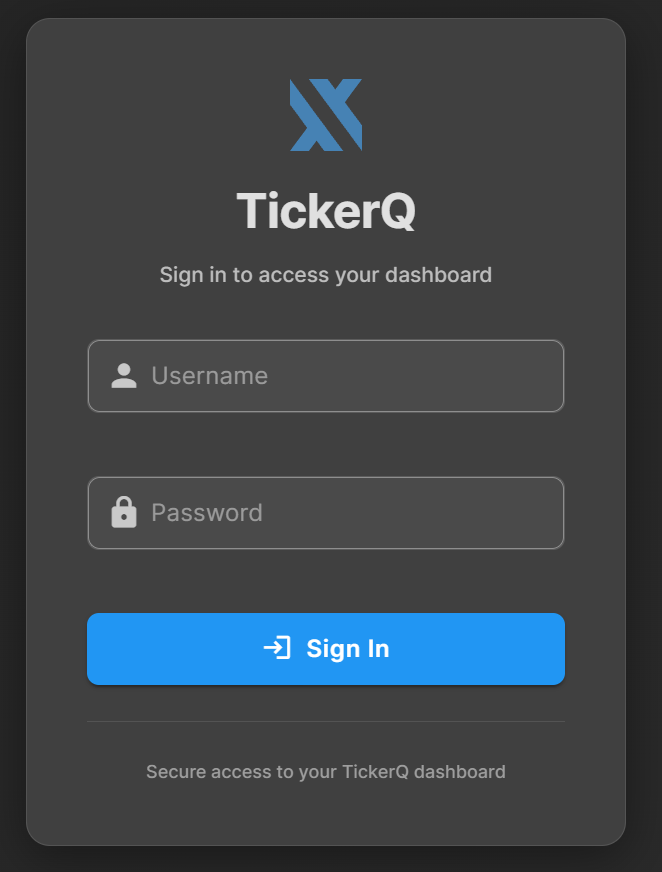
To access the dashboard, navigate to https://localhost:5001/tickerq-dashboard in your browser (whatever your port is).
Enter admin/admin to log in:
Summary
TickerQ is a modern, lightweight, and production-ready scheduling library for .NET applications — offering a refreshing alternative to Hangfire and Quartz.NET.
You can see how much more code Quartz requires when compared to TickerQ in this blog post.
Here is the full comparison table of TickerQ vs. Quartz vs. Hangfire:

You can find the image source - here.
Hope you find this newsletter useful. See you next time.
