Code reviews are critical but time-consuming. CodeRabbit acts as your AI co-pilot, providing instant code review comments and highlighting potential impacts on every pull request.
Beyond just flagging issues, CodeRabbit offers one-click fix suggestions and lets you define custom code quality rules using AST Grep patterns — catching subtle issues that traditional static analysis tools often miss.
CodeRabbit has already reviewed over 10 million pull requests, is installed on 2 million repositories, and is trusted by 100,000+ open-source projects. Best of all, CodeRabbit is free for all open-source repositories.
Deploy your .NET app globally in minutes — without cloud headaches (Sponsored)
Fly.io lets you deploy straight from your Dockerfile and run your app close to users worldwide, with built-in networking, autoscaling, and managed Postgres.
Working with large files in web applications is a common challenge.
When you need to handle file uploads for video streaming platforms, document management systems, or backup services, standard upload approaches often fail with timeout errors and consume excessive memory. These issues occur when users try to upload files that are hundreds of megabytes or several gigabytes in size.
Azure Blob Storage offers a robust and scalable solution for storing large files in the cloud.
However, the way you implement uploads matters.
A simple upload approach that works fine for small files will cause problems when handling a 2GB video file or a 500MB database backup.
In this post, we will explore:
How to Get Started With Azure Storage and Storing Blobs
Uploading Files With Simple Upload
Downloading Files From Blob Storage
Uploading Large Files by Chunks for Better Performance
How to Get Started With Azure Storage and Storing Blobs
Azure Blob Storage is a cloud-based object storage service that allows you to store massive amounts of unstructured data, including documents, images, videos, and backups.
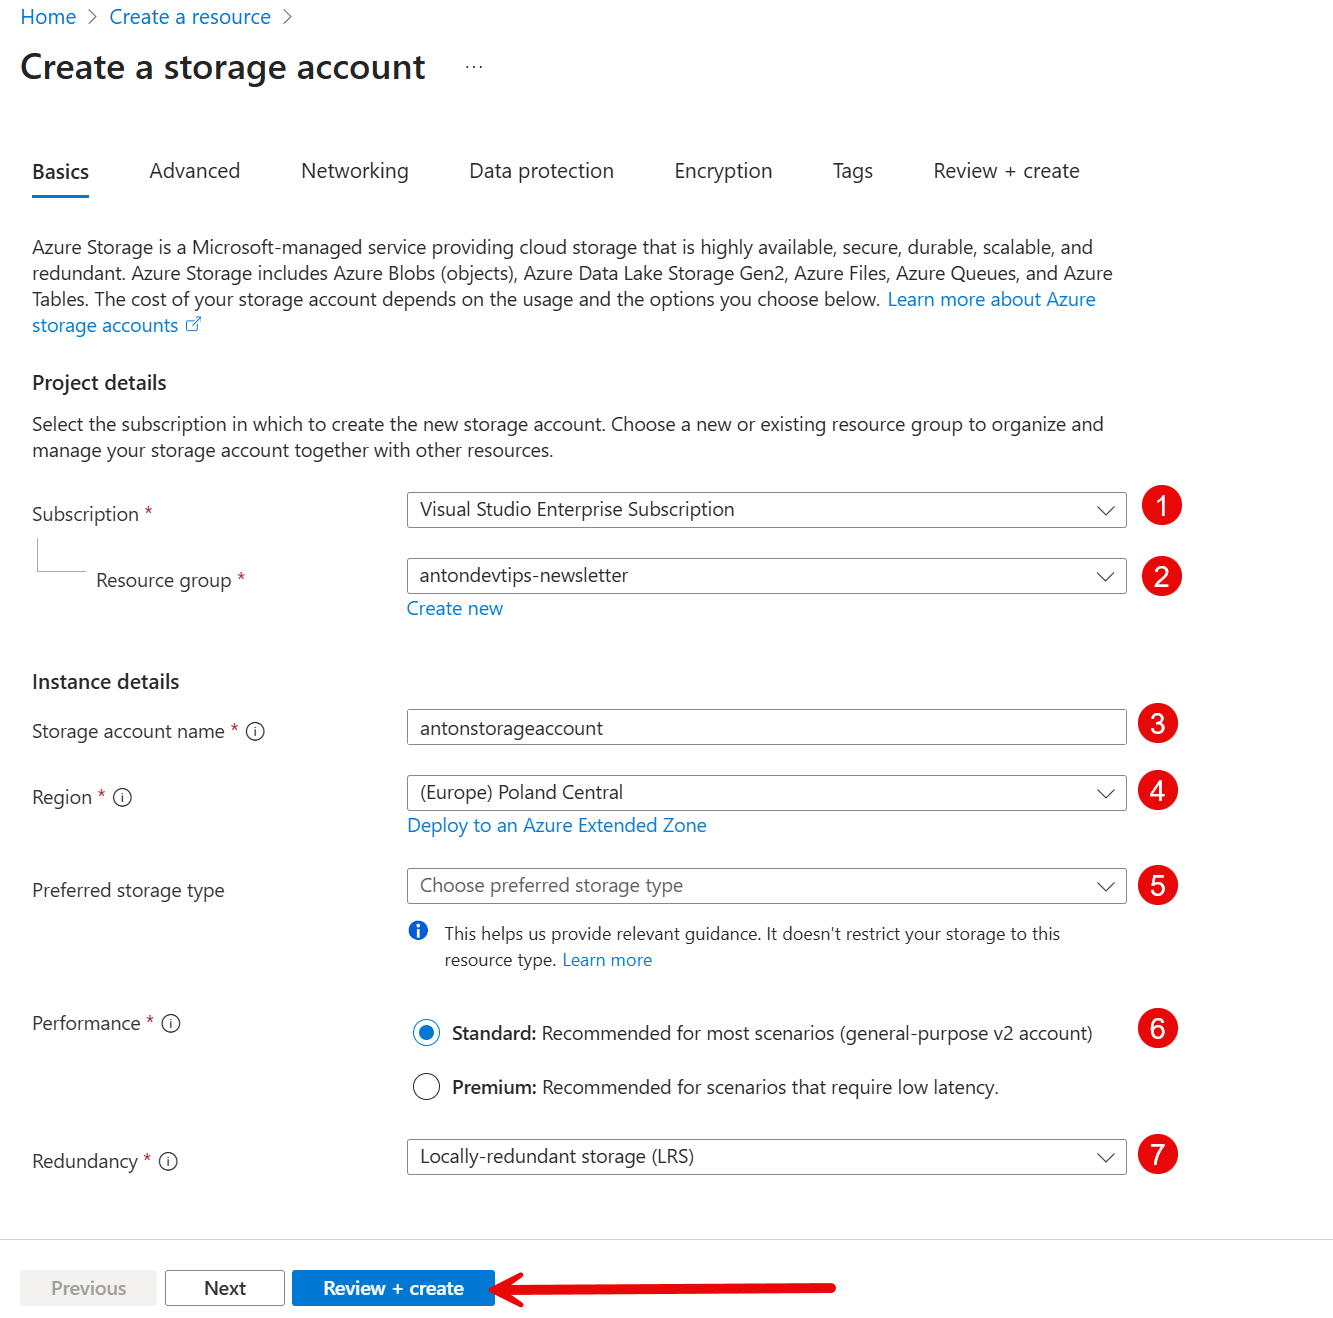
Before you can upload or download files in your .NET application, you need to set up an Azure Storage account and configure access to it.
Before we start, ensure you have an active Azure account to create and manage your resources.
Azure supports the following types of storage accounts:
Blob containers
File shares
Tables
Queues
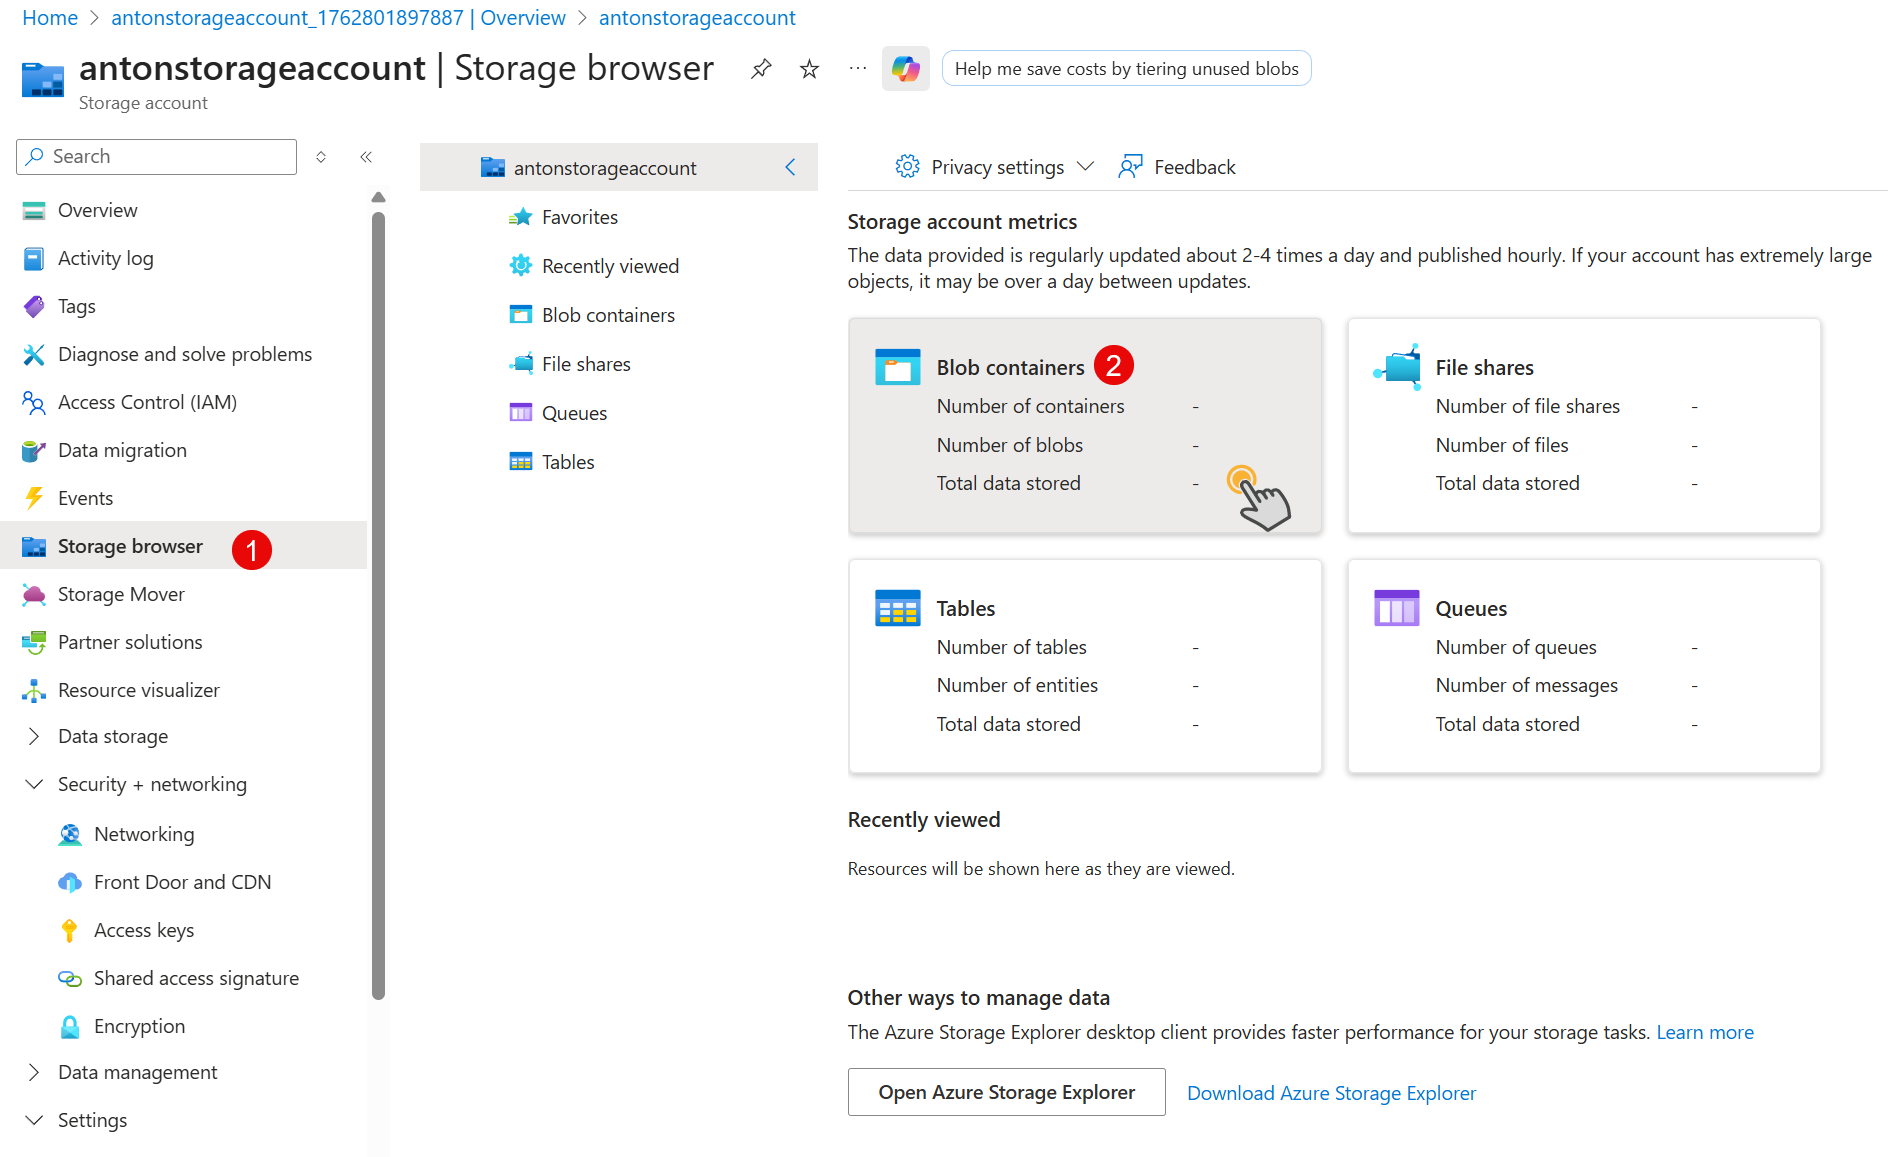
In this post, we will focus on blob containers.
A blob container is similar to a folder that organizes your blobs within a storage account.
You need at least one container to store files.
In your storage account, navigate to "Storage Browser" in the left menu
Click on "Blob Containers"
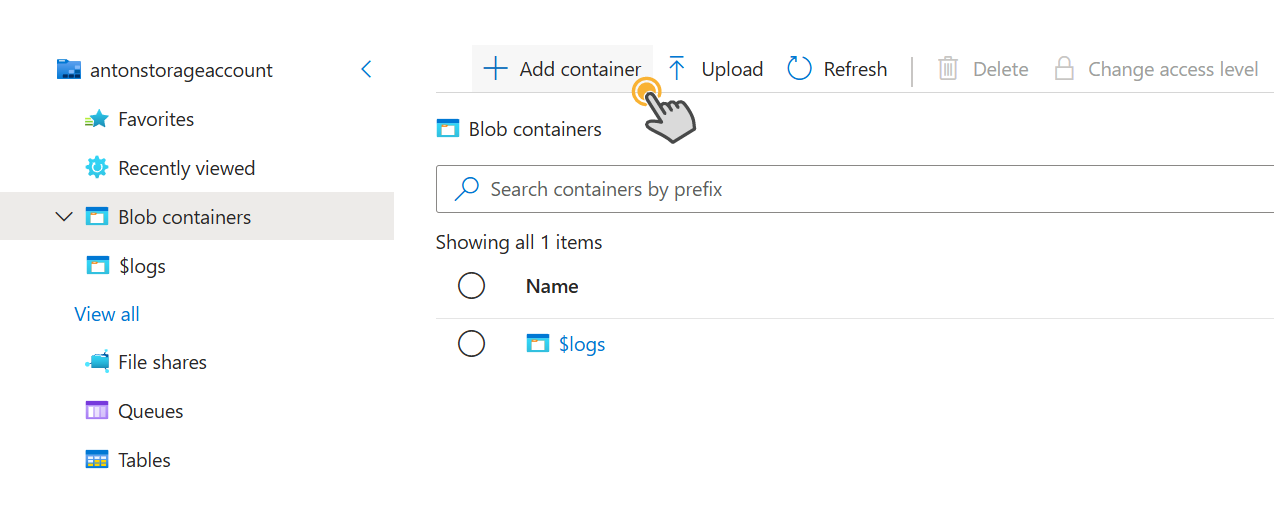
Click "Add container" in the top menu
Enter a container name "mediafiles" and click "create"
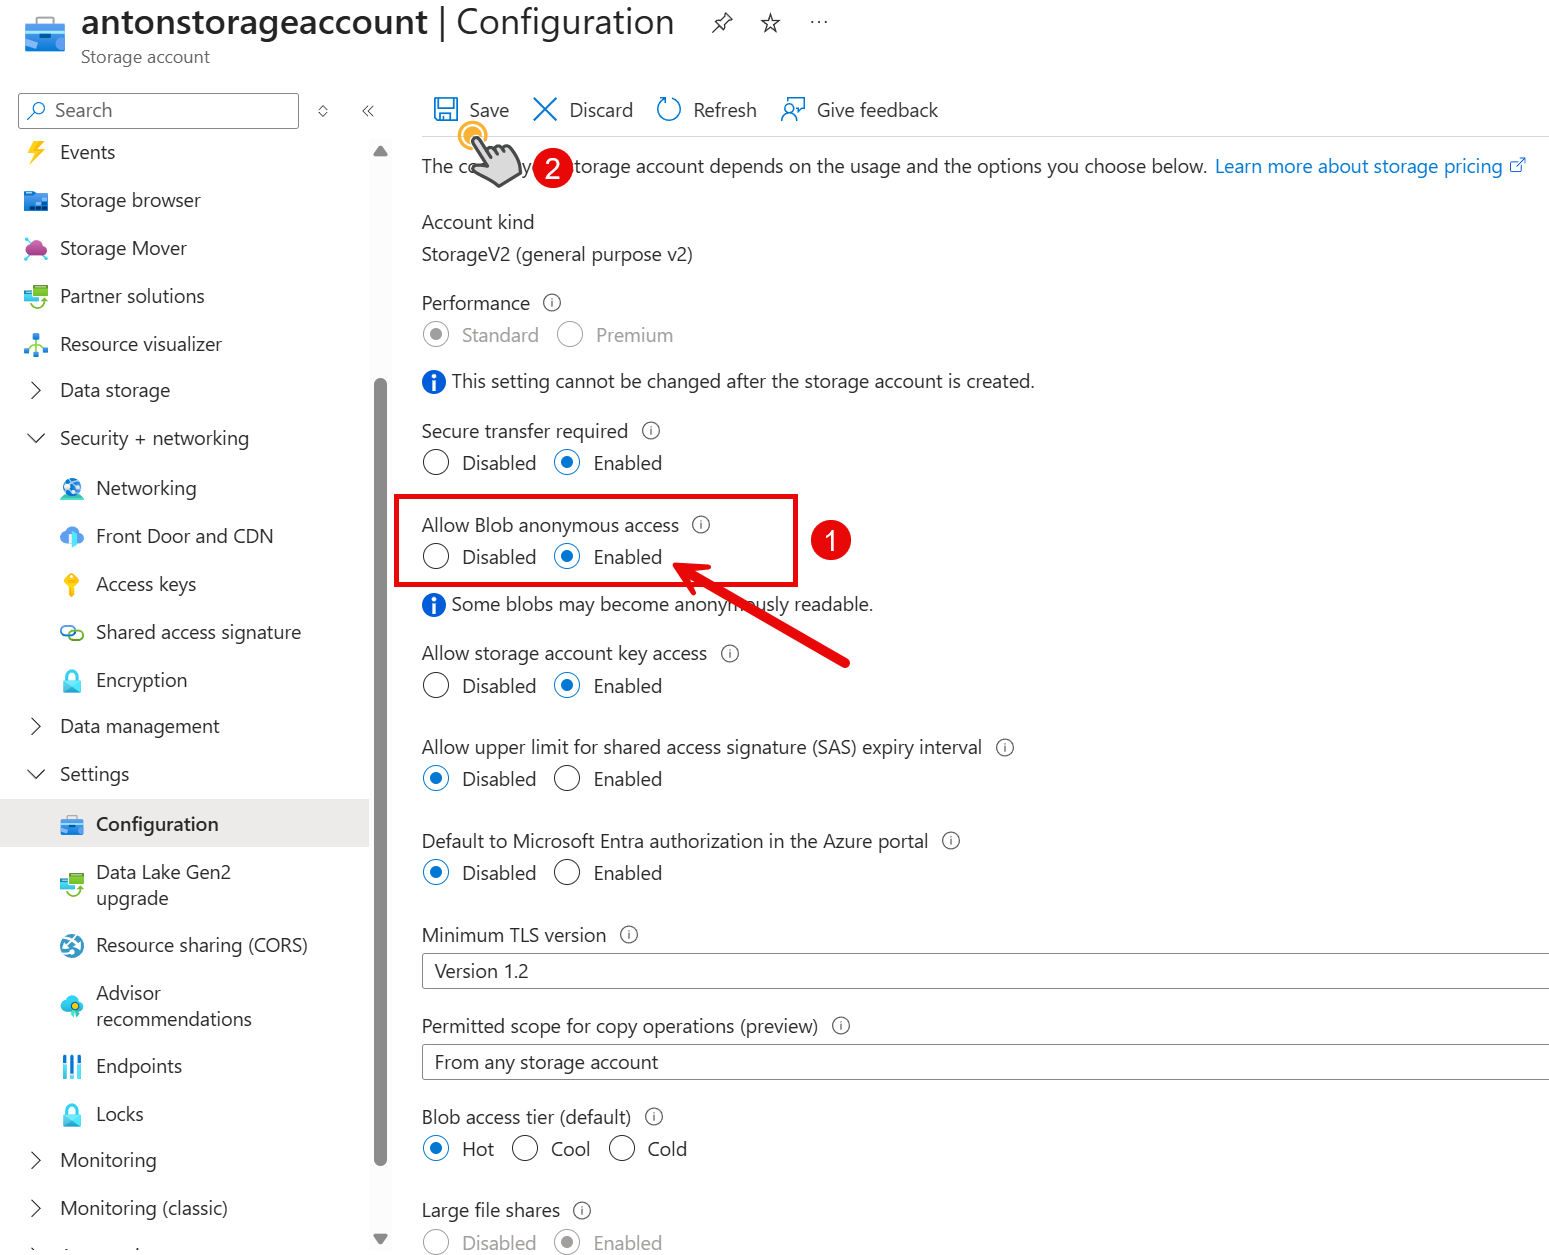
Navigate to "Settings" in the left menu and click "Configuration".
You need to enable the "Allow Blob anonymous access" option to download files from the container.
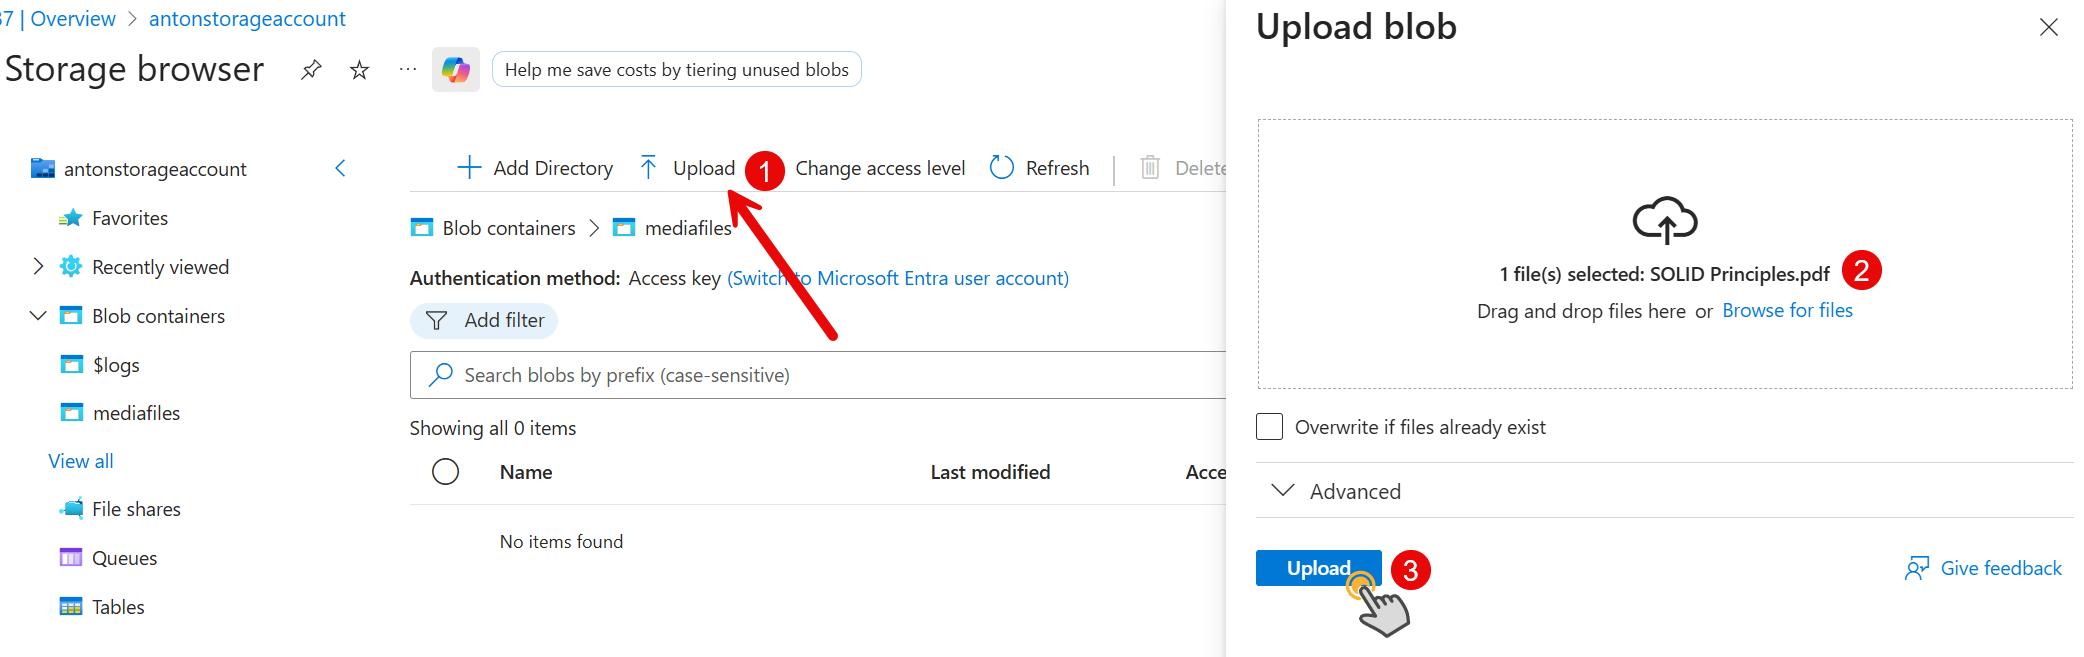
Upload a new file via "Storage browser" or the Azure Portal.
Let's try to access the file from our .NET application.
First, we need to get a "mediafiles" container client from the blob service client.
Then we can find all blobs with the "FileName" tag set to "SOLID Principles.pdf".
For each blob, we can get the blob client and print the blob name and URI.
The simplest way to upload files to Azure Blob Storage is using the UploadAsync method.
This approach works well for small to medium-sized files but has limitations when dealing with large files.
UploadAsync sends the entire file content to Azure Blob Storage in a single HTTP request.
The Azure SDK handles the upload process, and the file is stored as a blob with the specified name.
Let's create the AzureBlobStorageService class.
Before uploading a file, we need to create a container and get a BlobClient for the specified blob name:
Here we create BlobUploadOptions with the content type (defaults to application/octet-stream if not provided).
blobClient.UploadAsync method sends the file to Azure Blob Storage and returns the blob name after successful upload.
1publicsealedclassAzureBlobStorageConfiguration2{3publicstring ContainerName {get;init;}="files";45// 8 MB default chunk size (we will use this parameter in the next section)6publicint UploadChunkSizeBytes {get;init;}=8*1024*1024;7}
We will also need to configure the FormOptions in the ConfigureServices method to MAX out the default limits:
Here we specify [RequestSizeLimit(long.MaxValue)] and [DisableRequestSizeLimit] to allow large file uploads.
We create a stream from the file and pass it to the UploadSimpleAsync method.
Now, let's explore how to download files from Azure Blob Storage.
Downloading files from Azure Blob Storage is straightforward.
You retrieve the blob as a stream and return it to the client through your API endpoint.
When a client requests a file, your application queries Azure Blob Storage for the blob, retrieves it as a stream, and sends it back to the client.
The streaming approach is efficient because it does not load the entire file into memory at once.
Azure Blob Storage supports streaming downloads, which means you can start sending data to the client as soon as the first bytes arrive from Azure, without waiting for the complete file to download.
Let's add the download methods to your AzureBlobStorageService class:
1[HttpGet("{fileName}")]2publicasyncTask<IActionResult>Download([FromRoute]string fileName,CancellationToken cancellationToken)3{4if(string.IsNullOrWhiteSpace(fileName))5{6returnBadRequest("File name is required.");7}89try10{11var stream =await blobService.DownloadAsync(fileName, cancellationToken);12returnFile(stream,"application/octet-stream", fileName);13}14catch(FileNotFoundException e)15{16returnNotFound($"File {fileName} not found.");17}18}
We can also add the enableRangeProcessing parameter to the File method to enable range requests for our Web API clients:
Uploading Large Files by Chunks for Better Performance
Chunked upload is the recommended approach for uploading large files to Azure Blob Storage.
Instead of uploading the entire file in one request, you split the file into smaller blocks and upload them separately.
This approach solves the memory and timeout problems that occur with simple uploads when handling files larger than 100MB.
The 100MB value is subjective and depends on the size of your files and the memory available on your server.
Why is a chunked upload better for large files?
When you upload a 2GB video file using simple upload, your application needs to load the entire 2GB into memory before sending it to Azure.
This causes several problems:
Memory exhaustion: Loading large files into memory can cause OutOfMemoryException errors, especially when multiple users upload files simultaneously.
Request timeouts: Large files take longer to upload, and the HTTP request might timeout before completion.
Network failures: If the upload fails after 90% completion, you need to restart from the beginning and waste bandwidth.
Chunked upload solves these problems by:
Processing the file in small chunks (typically 4-8MB each) that fit comfortably in memory
Uploading each chunk independently with automatic retry for failed chunks
Allowing parallel chunk uploads for faster overall upload times
Providing better progress tracking and resumable uploads
Let's implement chunked upload in our AzureBlobStorageService:
Instead of allocating a new byte array for each chunk, the code rents a buffer from ArrayPool<byte>.Shared.
This reuses memory and reduces pressure on garbage collection.
We read the input stream in chunks of _uploadChunkSize bytes (default 8MB). The ReadAsync method returns the actual number of bytes read, which might be less than the chunk size for the last chunk.
Each block needs a unique identifier. The code converts the block index to bytes and then to a Base64 string. Azure requires block IDs to be Base64-encoded strings of the same length.
StageBlockAsync uploads each chunk to Azure Blob Storage. The blocks are stored temporarily and are not yet visible as a blob.
After all chunks are uploaded, CommitBlockListAsync combines them into a single blob in the order specified by the blockIds list. This is when the blob becomes visible and accessible.
Finally, we return the rented buffer to the ArrayPool to avoid memory leaks.
To use the new method in the Controller, we need to swap one line:
In this post, we have implemented large file uploads and downloads in Azure Blob Storage with .NET.
For files up to 50-100MB, simple upload using UploadAsync works fine; however, larger files require chunked uploads that split files into blocks (typically 4-8MB each) and upload them separately using StageBlockAsync and CommitBlockListAsync.
Use ArrayPool<byte>.Shared to reduce memory allocations and improve performance when handling chunk uploads.
Use DownloadStreamingAsync for downloads to stream content directly to clients without loading everything into memory.
Azure Blob Storage, combined with chunked uploads, gives you a scalable solution for handling files ranging from a few megabytes to several gigabytes in production applications.
If you like this article and want more Azure content, reply to this email and send me your Azure topic suggestions.
I may not be able to reply to everyone, but I read every email I receive.
Hope you find this newsletter useful. See you next time.
You can download source code for this newsletter for free
Covers everything: C#, ASP.NET Core, EF Core, system design — answer each question first, reveal the solution, and a test after every chapter proves it stuck. Finish, and you earn a verifiable certificate for your LinkedIn.
Not sure where you stand? Take the free .NET Developer Level Test:
Find out your real level — Junior to Senior+
15 minutes across 13 areas of C#, .NET, ASP.NET Core and System Design
No credit card required. When completed you get a personalized report: your level, your strongest areas, and where to focus next — the perfect way to benchmark yourself before diving into the Playbook.