
When writing unit and integration tests, assertions are critical for verifying the expected behavior of your code. However, complex assertions can lead to verbose and hard-to-maintain tests.
Today I will show how you can use a Verify library that simplifies assertions by using a snapshot-based testing approach. I will share with you my experience on using a Verify library in unit and integration tests.
What is Verify?
Verify is a library that allows you to perform snapshot-based testing. A snapshot is a saved version of your test result, such as an object or a response, which is then compared against future test runs to ensure the output remains consistent. If the output changes unexpectedly, Verify will fail the test and highlight the difference, allowing you to quickly identify and fix issues.
What Advantages Does Verify Provide?
- Readable Assertions: Unlike traditional assertions, where you compare expected and actual values directly in your code, Verify handles this for you by storing the expected result in a snapshot file. This makes your test easier to read.
- Maintainability: If the output changes due to an intended change in your code, you simply update the snapshot instead of modifying the test assertion logic.
- Flexibility: Verify supports a wide range of formats and types, including objects, JSON, XML, HTML, text, and more. It works seamlessly with various test frameworks like xUnit, NUnit, and MSTest.
Setting Up Verify
To get started with Verify, first, install the required NuGet package either for xUnit or NUnit:
csharpdotnet add package Verify.Xunit dotnet add package Verify.NUnit
I prefer using xUnit. I explained on LinkedIn why I prefer using xUnit over NUnit.
Let's look at a simple example of using Verify with xUnit to test a method that returns a complex object.
csharppublic class OrderServiceTests { [Fact] public async Task GetOrderById_ShouldMatchSnapshot() { // Arrange var orderService = new OrderService(); var orderId = 1; // Act var result = await orderService.GetOrderById(orderId); // Assert await Verify(result); } }
In this example, Verify(result) saves the output of GetOrderById method to a snapshot file.
On subsequent test runs, Verify will compare the result against the snapshot.
If there’s a difference, the test will fail, and Verify will provide a detailed diff of the changes.
Now let's explore how to use Verify in real-world application when writing unit and integration tests.
The Application We Will Be Testing
Today I'll show you how to write unit and integration tests for a Shipping Service that is responsible for creating and updating shipments for purchased products.
ShippingService implements the following use cases, available through webapi:
1. Create Shipment: saves shipment details to the database.
2. Update Shipment Status: updates the status of a shipment in the database.
3. Get Shipment By Number: returns a shipment from a database by a number.
ShippingService has the following integrations:
- Postgres database, using EF Core
- Stock-Service, Carrier-Service, using HTTP
Each use case exposes a webapi endpoint implemented by ASP.NET Core Minimal APIs. Each endpoint uses MediatR to publish a corresponding Command or Query to implement the use case.
Let's have a look at implementations of "Create Shipment" use case. It implements the following flow:
- checks if a Shipment for a given OrderId is already created
- checks
Stock-Servicewhether it has available number of Products - creates Shipment in the database
- sends request to the
Carrier-Servicewith shipment details
Let's explore the command handler Handle method that implements the given logic:
csharpinternal sealed class CreateShipmentCommandHandler( IShipmentRepository repository, IStockApi stockApi, ICarrierApi carrierApi, ILogger<CreateShipmentCommandHandler> logger) : IRequestHandler<CreateShipmentCommand, ErrorOr<ShipmentResponse>> { public async Task<ErrorOr<ShipmentResponse>> Handle( CreateShipmentCommand request, CancellationToken cancellationToken) { var shipmentAlreadyExists = await repository.ExistsAsync(request.OrderId, cancellationToken); if (shipmentAlreadyExists) { logger.LogInformation("Shipment for order '{OrderId}' is already created", request.OrderId); return Error.Conflict($"Shipment for order '{request.OrderId}' is already created"); } var products = request.Items.Select(x => new Product(x.Product, x.Quantity)).ToList(); var stockResponse = await stockApi.CheckStockAsync(new CheckStockRequest(products)); if (!stockResponse.IsSuccessStatusCode) { logger.LogInformation("Received error from stock-service: {ErrorMessage}", stockResponse.Error.Content); return Error.Validation("ProductsNotAvailableInStock", $"Received error from stock-service: '{stockResponse.Error.Content}'"); } if (!stockResponse.Content.IsSuccess) { logger.LogInformation("Received error from stock-service: {ErrorMessage}", stockResponse.Content.ErrorMessage); return Error.Validation("ProductsNotAvailableInStock", $"Received error from stock-service: '{stockResponse.Content.ErrorMessage}'"); } var shipmentNumber = new Faker().Commerce.Ean8(); var shipment = request.MapToShipment(shipmentNumber); await repository.AddAsync(shipment, cancellationToken); logger.LogInformation("Created shipment: {@Shipment}", shipment); var carrierRequest = new CreateCarrierShipmentRequest(request.OrderId, request.Address, request.Carrier, request.ReceiverEmail, request.Items); await carrierApi.CreateShipmentAsync(carrierRequest); var response = shipment.MapToResponse(); return response; } }
For communication with Stock-Service and Carrier-Service I use IStockApi and ICarrierApi correspondingly.
They are Refit API interfaces:
csharppublic interface IStockApi { [Post("/api/stocks/check")] Task<ApiResponse<CheckStockResponse>> CheckStockAsync([Body] CheckStockRequest request); } public interface ICarrierApi { [Post("/api/shipments")] Task CreateShipmentAsync([Body] CreateCarrierShipmentRequest request); }
I really love using Refit library for communication with other services via HTTP protocol.
This library provides an interface wrapper (with code generation) that wraps HttpClient using HttpClientFactory.
Now let's explore how to write tests with Verify.
Writing Integration Tests with Verify
Integration testing is a type of software testing essential for validating the interactions between different components of an application, ensuring they work together as expected. The main goal of integration testing is to identify any issues that may arise when these components interact with each other.
Integration testing uses actual implementations of dependencies like databases, message queues, external services, and APIs to validate real interactions.
Let's create an integration test for a "Create Shipment" use case. We will use xUnit, WebApplicationFactory and TestContainers:
csharp[Fact] public async Task CreateShipment_ShouldSucceed_WhenRequestIsValid() { // Arrange var address = new Address("Amazing st. 5", "New York", "127675"); List<ShipmentItem> items = [ new("Samsung Electronics", 1) ]; var request = new CreateShipmentRequest("12345", address, "Modern Shipping", "[email protected]", items); // Act var httpResponse = await factory.HttpClient.PostAsJsonAsync("/api/shipments", request); var shipmentResponse = (await httpResponse.Content.ReadFromJsonAsync<ShipmentResponse>(_jsonSerializerOptions))!; // Assert httpResponse.StatusCode.Should().Be(HttpStatusCode.OK); shipmentResponse.Should().BeEquivalentTo(new ShipmentResponse( shipment.Number, shipment.OrderId, shipment.Address, shipment.Carrier, shipment.ReceiverEmail, shipment.Status, shipment.Items.Select(i => new ShipmentItemResponse(i.Product, i.Quantity)).ToList() )); }
As you can see, our assertion is pretty big:
csharpshipmentResponse.Should().BeEquivalentTo(new ShipmentResponse( shipment.Number, shipment.OrderId, shipment.Address, shipment.Carrier, shipment.ReceiverEmail, shipment.Status, shipment.Items.Select(i => new ShipmentItemResponse(i.Product, i.Quantity)).ToList() ));
Now let's rewrite this assertion with Verify:
csharp// Replace complex assertions with single line of code await Verify(shipmentResponse);
And that's all you need! Really!
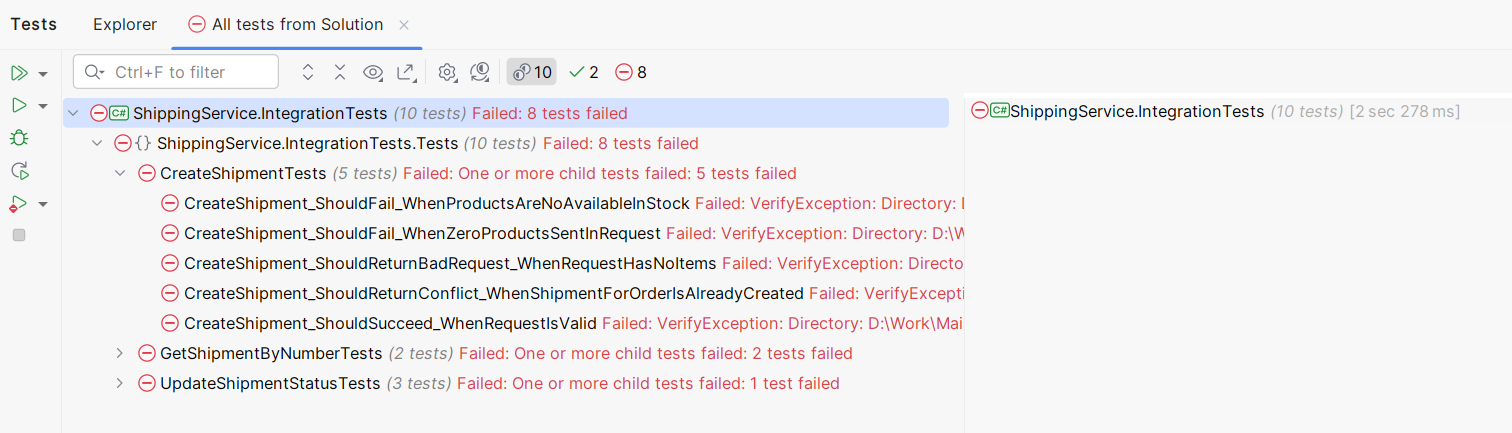
When running tests for the first time, all tests would fail. That's because Verify doesn't have a saved snapshot yet.
After a test fails, a Verify will open the default difference comparer application with 2 snapshots: current and a saved one. You need to decide whether you need to update the saved snapshot, correct the test or fix the code.
As we don't have a saved snapshot yet, we need to save it. Here is an example of snapshot comparisons:
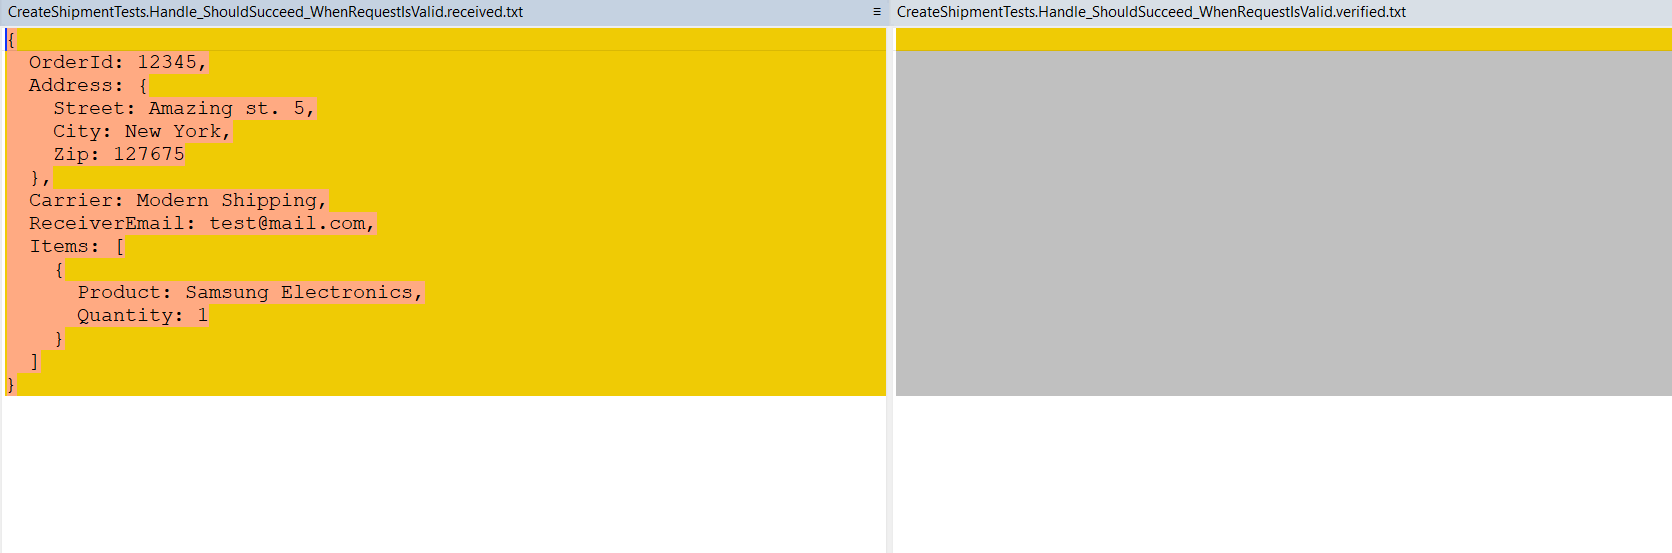
I use WinMerge, you can use any tool you prefer (even a Git diff comparer).
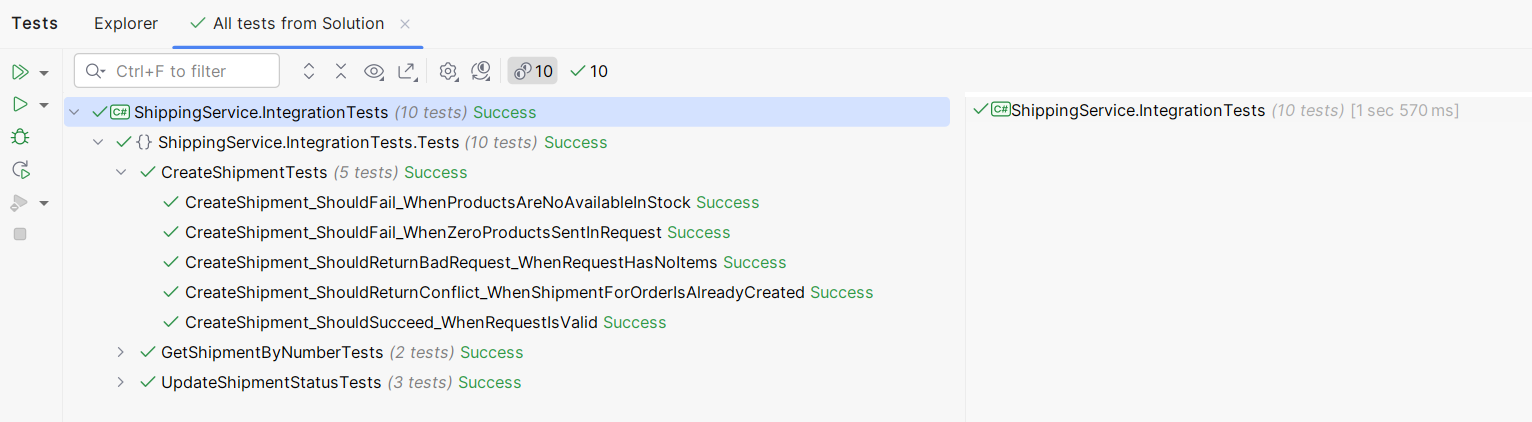
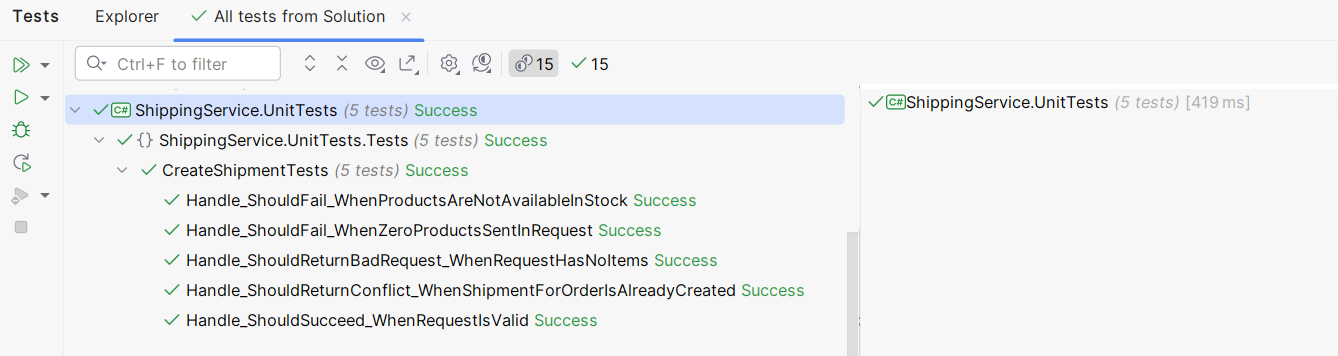
After saving all the snapshots, we can see that all tests are now successfully completed:
Updating Snapshots and Ignoring Members
Let's update our code and generate a ShipmentResponse.Number randomly.
After running a test it will fail, as ShipmentResponse.Number differs in current and saved snapshot:
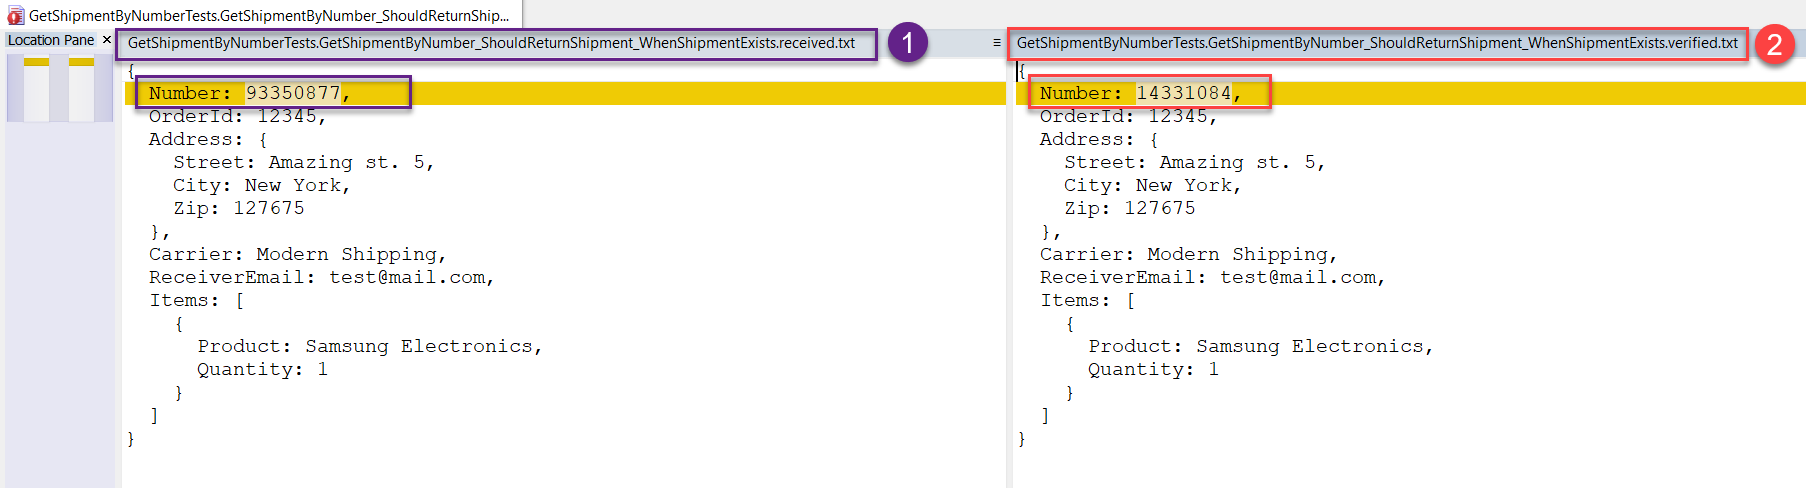
To fix this issue, you can use IgnoreMember method to ignore the ShipmentResponse.Number property when comparing snapshots:
csharpawait Verify(shipmentResponse) .IgnoreMember<ShipmentResponse>(x => x.Number);
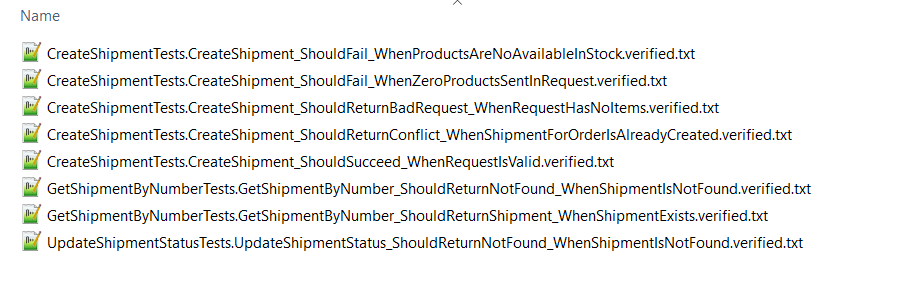
Snapshots Location
All snapshots are saved into the current tests folder and have the following name template:
TestClass.TestName.verified.txt // For example CreateShipmentTests.CreateShipment_ShouldSucceed_WhenRequestIsValid.verified.txt
I recommend changing the default snapshot folder with a separate folder location, so the snapshots won't pollute our solution.
You need to execute this code in either the test's constructor or WebApplicationFactory setup section:
csharpVerifier.DerivePathInfo( (sourceFile, projectDirectory, type, method) => new PathInfo( directory: Path.Combine(projectDirectory, "verify_files"), typeName: type.Name, methodName: method.Name));
You can find the full source code of the application and integration tests at the end of the blog post.
Writing Unit Tests with Verify
Unit Testing: typically uses mocks or stubs to simulate dependencies, ensuring the test environment is controlled and isolated.
Let's create our tests' setup with xUnit and NSubstitute for mocks:
csharppublic class CreateShipmentTests { private readonly IShipmentRepository _mockRepository; private readonly IStockApi _mockStockApi; private readonly ICarrierApi _mockCarrierApi; private readonly CreateShipmentCommandHandler _handler; public CreateShipmentTests() { _mockRepository = Substitute.For<IShipmentRepository>(); _mockStockApi = Substitute.For<IStockApi>(); _mockCarrierApi = Substitute.For<ICarrierApi>(); var logger = NullLogger<CreateShipmentCommandHandler>.Instance; _handler = new CreateShipmentCommandHandler( _mockRepository, _mockStockApi, _mockCarrierApi, logger ); } }
Now let's write a unit test with that tests CreateShipmentCommand:
csharp[Fact] public async Task Handle_ShouldSucceed_WhenRequestIsValid() { // Arrange var address = new Address { Street = "Amazing st. 5", City = "New York", Zip = "127675" }; List<ShipmentItem> items = [ new ShipmentItem("Samsung Electronics", 1) ]; var command = new CreateShipmentCommand("12345", address, "Modern Shipping", "[email protected]", items); _mockRepository.ExistsAsync("12345", Arg.Any<CancellationToken>()).Returns(false); var stockApiResponse = new ApiResponse<CheckStockResponse>( new HttpResponseMessage(HttpStatusCode.OK), new CheckStockResponse(true, string.Empty), null!); _mockStockApi.CheckStockAsync(Arg.Any<CheckStockRequest>()) .Returns(stockApiResponse); _mockCarrierApi.CreateShipmentAsync(Arg.Any<CreateCarrierShipmentRequest>()) .Returns(Task.CompletedTask); // Act var result = await _handler.Handle(command, CancellationToken.None); // Assert result.IsError.Should().BeFalse(); result.Value.OrderId.Should().Be("12345"); result.Value.Should().NotBeNull(); result.Value.Number.Should().Be(shipmentNumber); result.Value.Should().BeEquivalentTo(new ShipmentResponse( shipment.Number, shipment.OrderId, shipment.Address, shipment.Carrier, shipment.ReceiverEmail, shipment.Status, shipment.Items.Select(i => new ShipmentItemResponse(i.Product, i.Quantity)).ToList() )); }
As you can see, our assertion is pretty big:
csharpresult.Value.Should().NotBeNull(); result.Value.Number.Should().Be(shipmentNumber); result.Value.Should().BeEquivalentTo(new ShipmentResponse( shipment.Number, shipment.OrderId, shipment.Address, shipment.Carrier, shipment.ReceiverEmail, shipment.Status, shipment.Items.Select(i => new ShipmentItemResponse(i.Product, i.Quantity)).ToList() ));
Now let's rewrite this assertion with Verify:
csharpawait Verify(result.Value) .IgnoreMember<ShipmentResponse>(x => x.Number);
And that's it!
You can find the full source code of the application and integration tests at the end of the blog post.
Summary
Verify simplifies assertions in your unit and integration tests by using a snapshot-based approach. It reduces verbosity, improves readability, and makes your tests more maintainable. By adopting Verify, you can ensure that your tests remain robust and easy to manage as your code evolves.
Should you replace all your assertions with Verify? Absolutely no!
Use Verify to simplify your tests' implementation, when it's easier to verify by your eye 2 snapshots rather than spending a lot of time writing complex assertions. I use Verify in my unit and, especially, integration tests for complex and large objects, GraphQL responses, reports, etc.
Hope you find this newsletter useful. See you next time.
