If you have ever tried to create a nice-looking emails with HTML, you probably had a bad experienced while styling email letters with inline CSS properties. All due to the limited support for external stylesheets in email clients.
Styling the emails has been a challenge due to inconsistent support for CSS across different email clients. The common approach is to use inline CSS and tables for layout, ensuring compatibility across various clients.
You probably want to use CSS files to style the email, or use your favourite frontend framework. If you only could use React to create emails...
And you can, really! In today's post we'll dive into how to use React to create beautiful and modern emails without stress.
There is a library, called react-email, that is designed to make email creation easier and more efficient by using the component-based architecture of React. It allows developers to build and style emails using familiar React components, providing better development experience, reusability and maintainability.
There are two ways to get started with react-email library:
- create a new project automatically from a template
- manually add react-email into an existing project
In today's post we'll explore the 1st option as it is more popular.
First, you need to create a project:
bashnpx create-email@latest
This will create a new folder react-email-starter with some email templates.
Then install the dependencies:
bashnpm install
Run the web application and open http://localhost:3000/ in your web browser:
bashnpm run dev

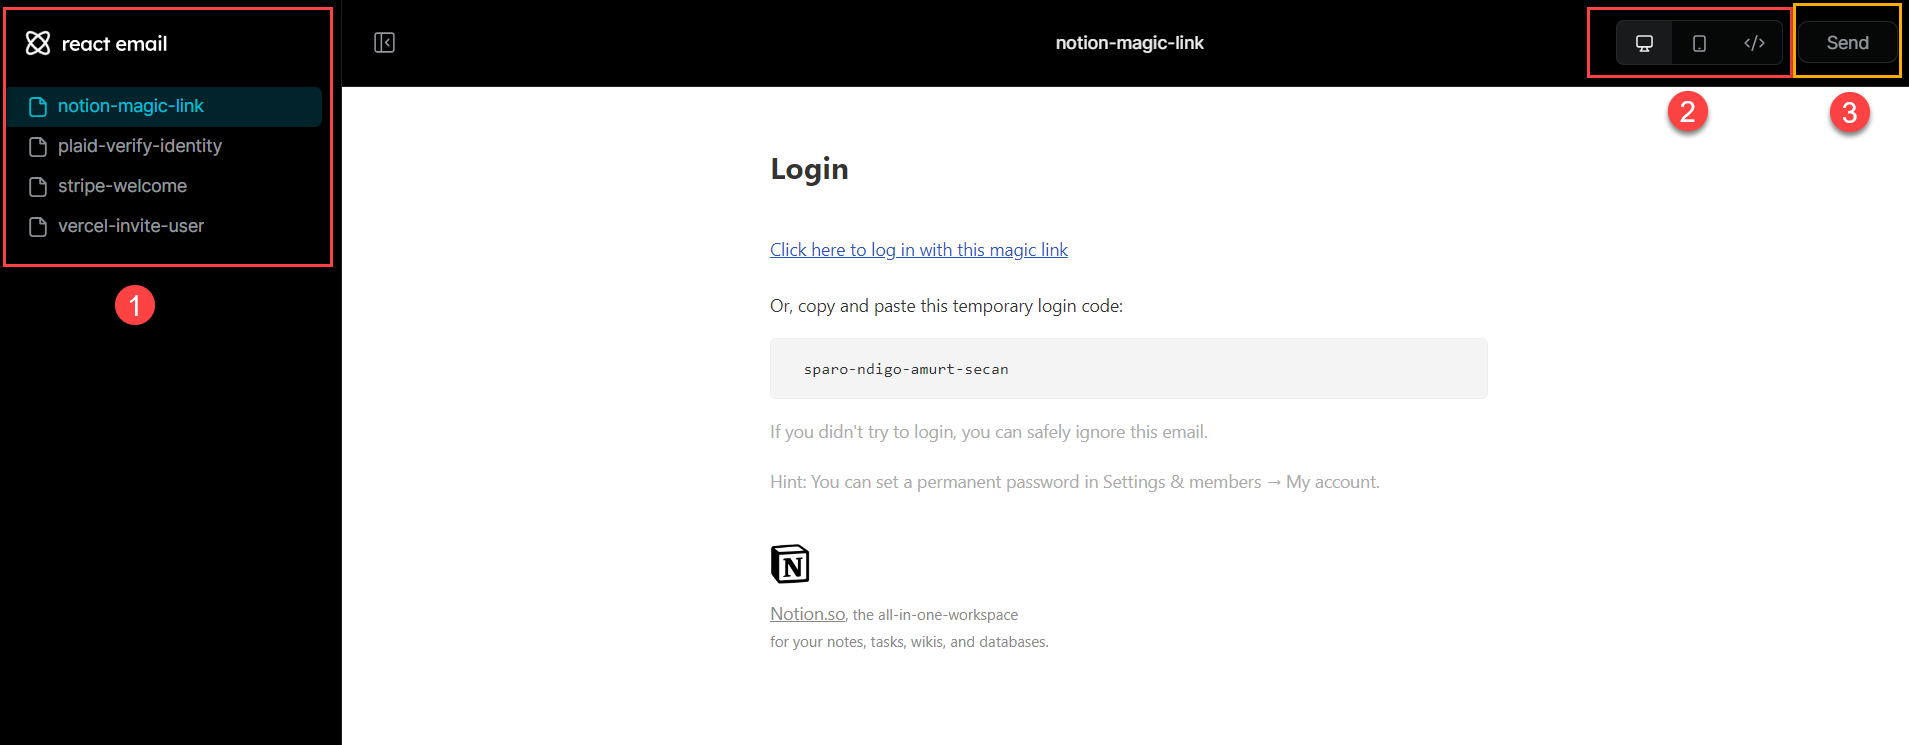
In this page, you can do the following:
- Select and view a built-in email templates or new templates that you've created
- View email on PC screen or mobile screen. Or view the code.
- Send a letter on your email to see how it is rendered in the real email client.
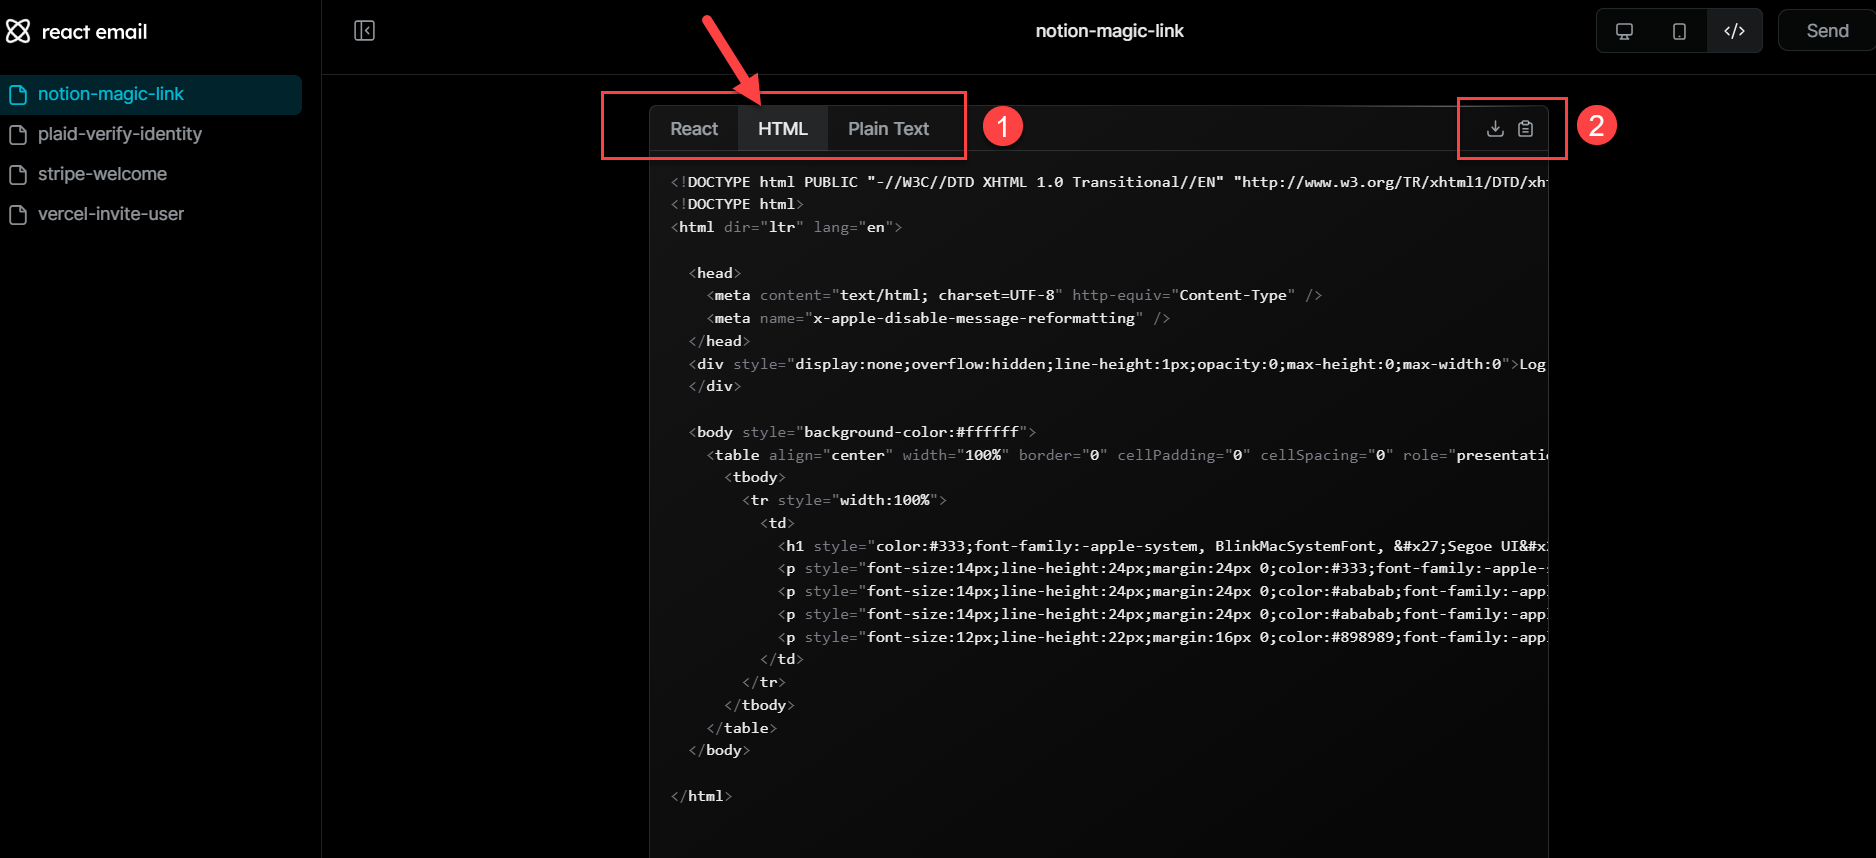
An ability to view code is what this library was built for:

You create an email using React, and the library does all dirty work for you to transform React components to HTML tags with inline styles that email clients can visualize. It's a complete win, you don't need to spend hours and nights trying to create a good-looking emails.
There still could be some limitations, but they could be resolved more easily in React.
You have two options, either you can use the @react-email/components NPM package to get all the components or install each component as a separate option if you want your bundle to be a small as possible.
When creating a project from a template the @react-email/components package is installed.
Let's create our first email. First add a new file into the emails folder, let's call it "WelcomeEmail":

We are going to add some styling to our email, here is a full code:
tsxexport const WelcomeEmail = () => {
    return (
        <Html lang="en">
            <Body style={body}>
                <h1>Welcome to the Email</h1>
                <Button href="https://example.com" style={button}>
                    Confirm your email here
                </Button>
            </Body>
        </Html>
    );
};

const body = {
    fontFamily: '-apple-system,BlinkMacSystemFont,"Segoe UI",Roboto,"Helvetica Neue",Ubuntu,sans-serif'
};

const button = {
    backgroundColor: "#0095ff",
    border: "1px solid #0077cc",
    fontSize: "17px",
    lineHeight: "17px",
    padding: "13px 17px",
    borderRadius: "4px",
    color: "#fff",
    width: "200px",
};

export default WelcomeEmail;
After saving the file, in the web browser at http://localhost:3000/ you can see a new email without refreshing a page:

It's important to have an export default WelcomeEmail, otherwise a new email won't appear in the left panel.
You can find a lot of ready email examples on the official website.
React-Email library has the following components for creating emails:
- Html - corresponds to regular
<html>tag - Head - corresponds to regular
<head>tag - Button - a link that is styled to look like a button
- Container - a layout component that centers all the content inside
- CodeBlock - display code with a selected theme and regex highlighting using Prism.js
- CodeInline - display a predictable inline code HTML element that works on all email clients
- Column - display a column that separates content areas vertically in your email. A column needs to be used in combination with a Row component.
- Row - display a row that separates content areas horizontally in your email.
- Font - sets a font
- Heading - corresponds to a heading tag (h1, h2, etc)
- Hr - display a divider that separates content areas in your email
- Image - just an image
- Link - a hyperlink to web pages, email addresses, or anything else a URL can address
- Markdown - converts markdown (MD content) to valid react-email template code
- Preview - a preview text that will be displayed in the inbox of the recipient
- Section - display a section that can also be formatted using rows and columns
- Tailwind - a React component to wrap emails with Tailwind CSS
- Text - a block of text separated by blank spaces
You can read documentation with examples for each component on the official website.
React-Email library under the hood uses a render package to transform React components into HTML:
bashnpm install @react-email/render -E
tsximport { WelcomeEmail } from "./email";
import { render } from "@react-email/render";

const html = render(<WelcomeEmail />, {
  pretty: true,
});

console.log(html);
If you need a minified version of HTML, set the pretty prop to false.
If you need plain text instead of HTML, set the plainText prop to true.
After you have an HTML content for your email crafted from React components, you can integrate with any email service provider.
You can use the following email providers with React Email:
- Resend
- Nodemailer
- SendGrid
- Postmark
- AWS SES
- MailerSend
- Plunk
Find out more information about these integrations on the official web site.
Hope you find this newsletter useful. See you next time.
